Jenna's Pie Palace
  • The Recipes
  • "Waitress" Pies
  • Contact

what's inside:
pie recipes inspired by the movie and musical waitress.

sugar... butter... flour.

Marshmallow Mermaid Pie

7/14/2016

24 Comments

 
Picture

Dr. Pomatter: Did you make the marshmallow pie that you gave me?

Jenna: Yes I did. Mermaid Marshmallow. I invented it with my mama when I was 9 years old, in my mermaid phase.
​
Dr. Pomatter: That was probably the best pie that I've tasted in my entire life. No seriously. It was BIBLICALLY good. That's how good it was. That pie would win contests, and ribbons... and things... It only taste a taste!


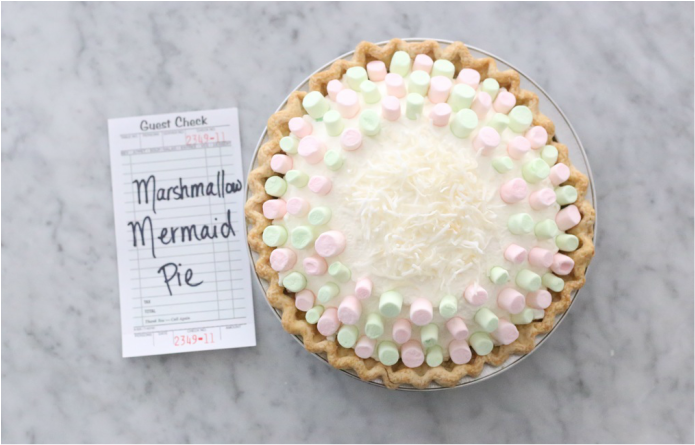
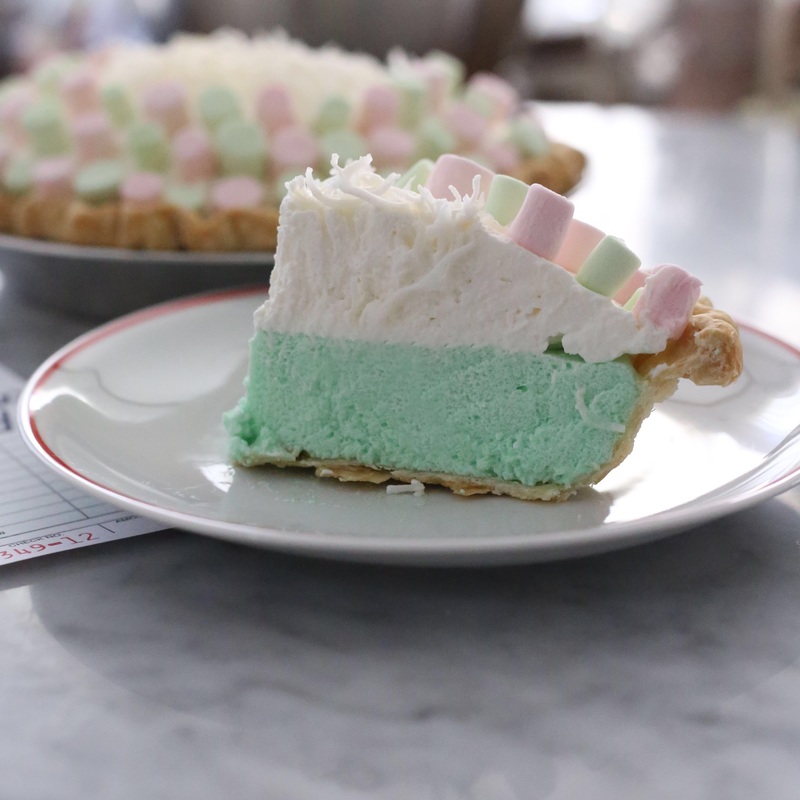
Oops. So in the Musical this pie is called Mermaid Marshmallow, but the in the movie it's Marshmallow Mermaid. Oh well, still a delicious marshmallow pie either way right? I've been waiting to bake this one. Because I knew it had to taste and look so good. This is THE pie that people remember from the movie, and is probably the most recreated recipe from Waitress. There is a popular recipe for this pie online. It involves a graham cracker crust, coconut mixed into the crust, and chocolate bits in the whipped cream. I'm sure that version is delicious, but I wanted to create a pie that looked a little cleaner, and used marshmallow pudding as the main ingredient. This pie is sweet, cute, and delicious! 

Here it is! The BIBLICALLY good pie that made Dr. Pomatter fall for Jenna at first taste: "Marshmallow Mermaid Pie: Truly flaky crust, filled with a pillow of gorgeous marshmallow puddin', and a layer of freshly whipped coconut cream. Topped with pink and green mini marshmallows and sweetened shredded coconut."

Picture
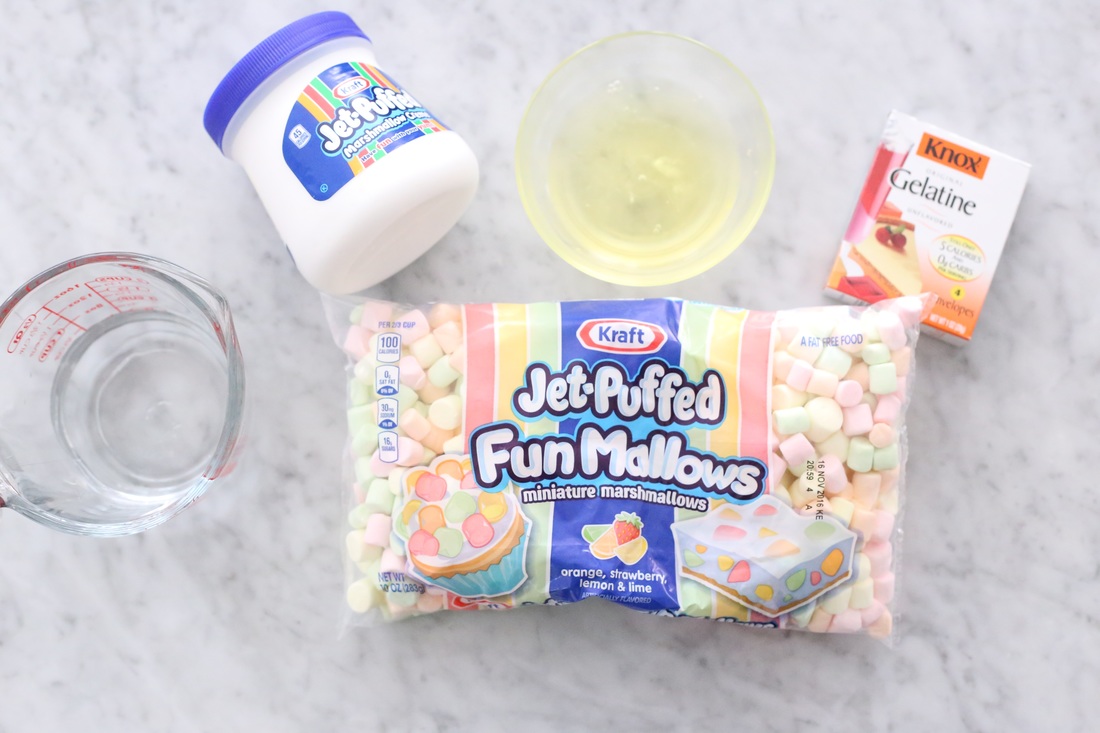
Gather your gelatin, water, egg whites, FunMallows. (I didn't end up using the marshmallow creme.)
Picture
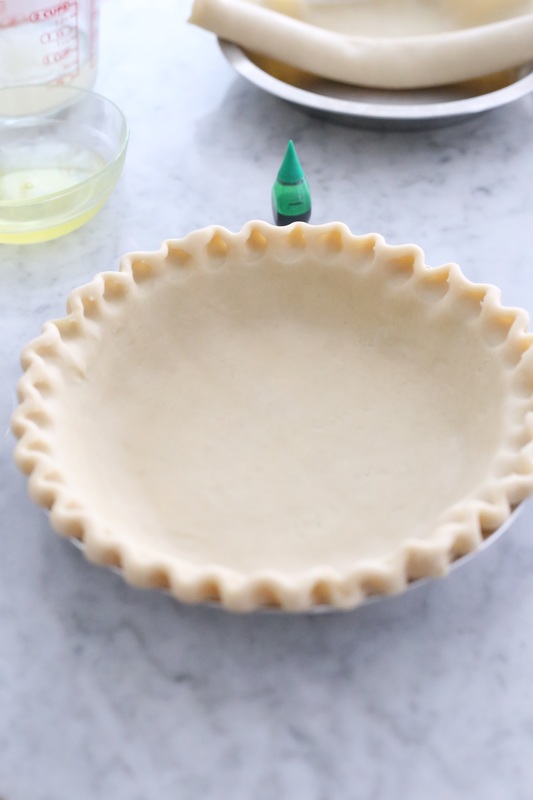
Prepare your truly flaky crust, crimp the edges.
Picture
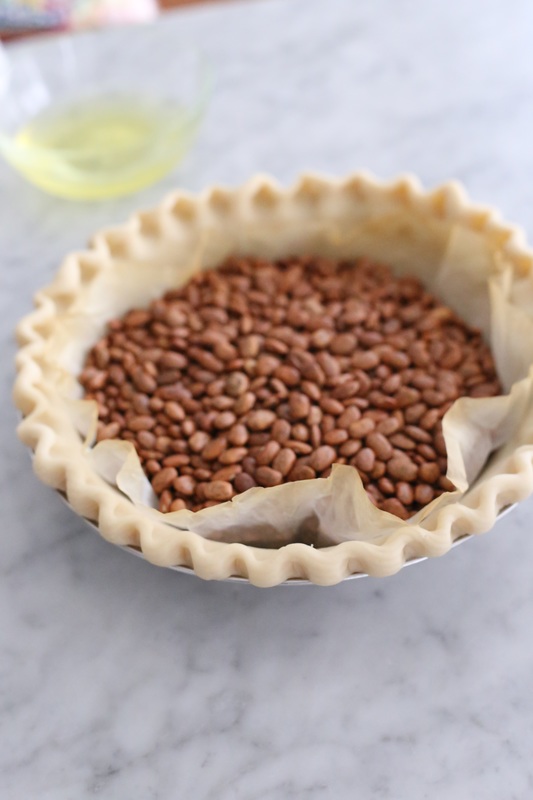
Blind bake your crust.
Picture
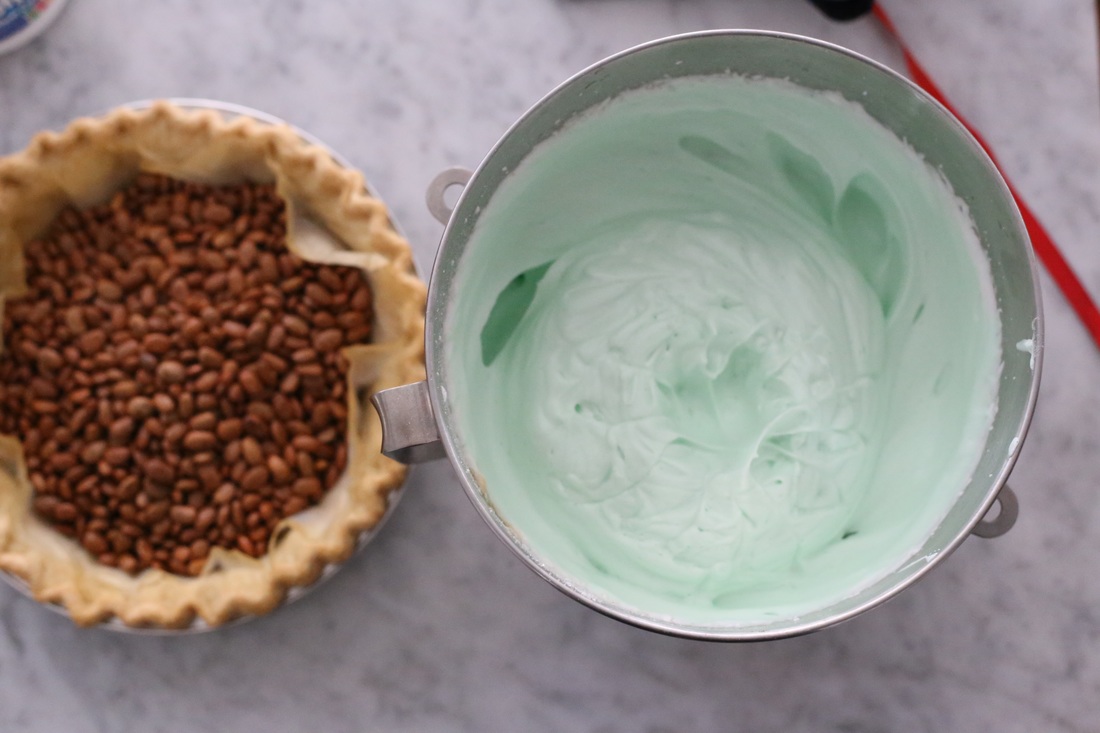
Whip up your marshmallow puddin'!
Picture
Picture
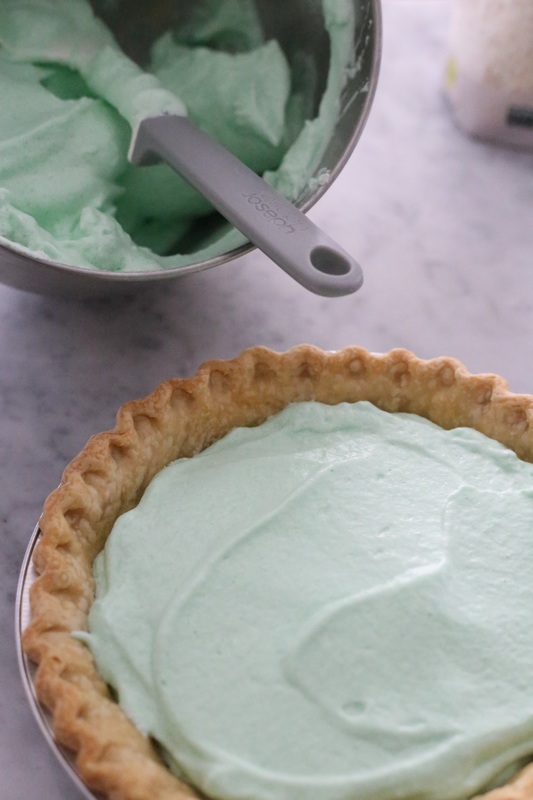
Spread marshmallow puddin' in your baked crust.
Picture
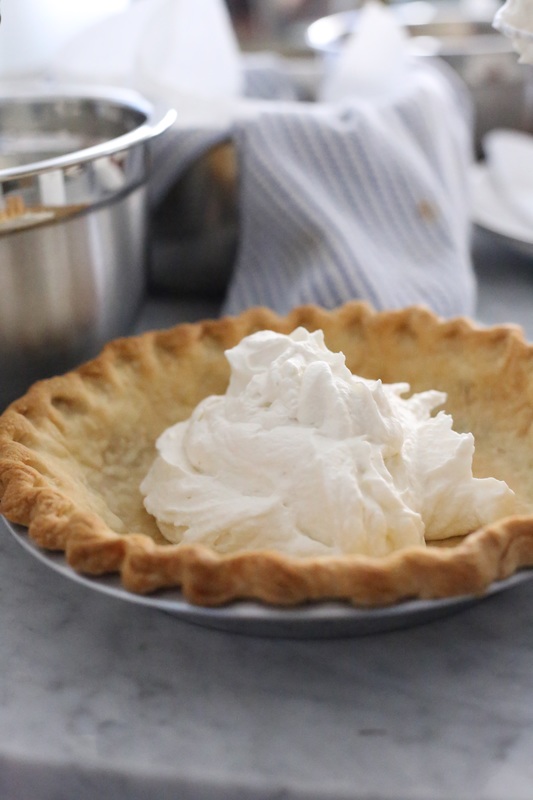
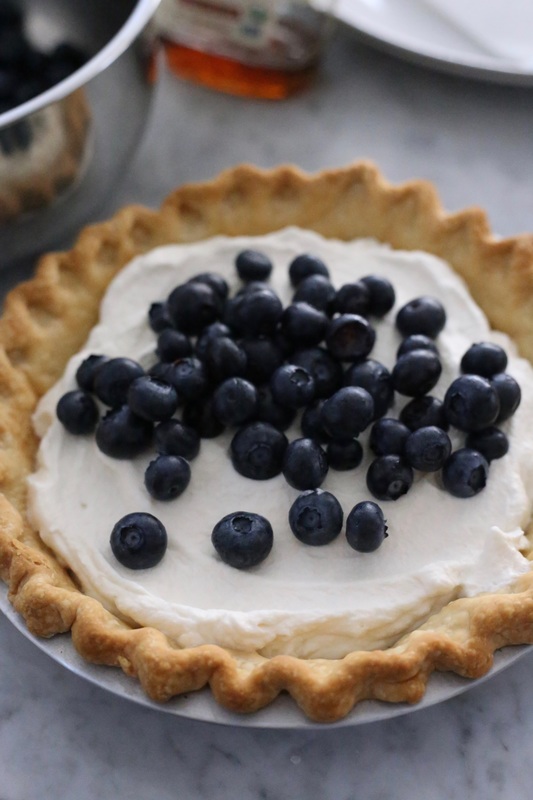
Layer coconut whipped cream atop the puddin'.
Picture
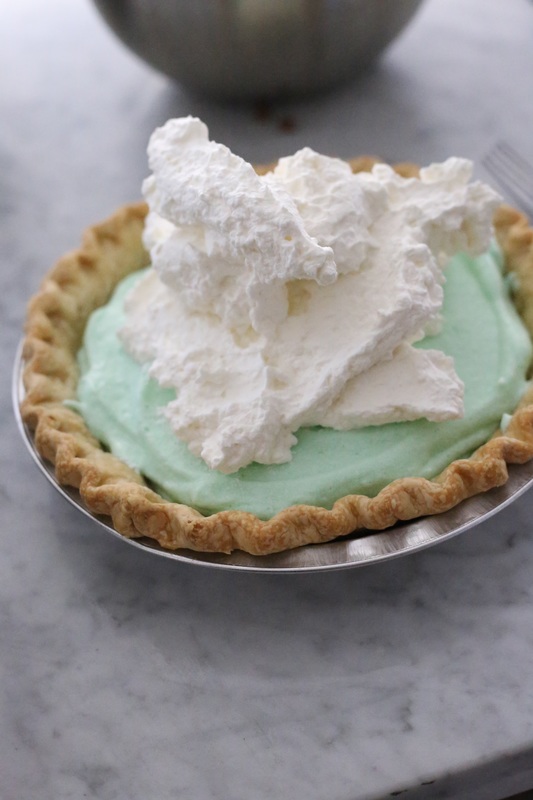
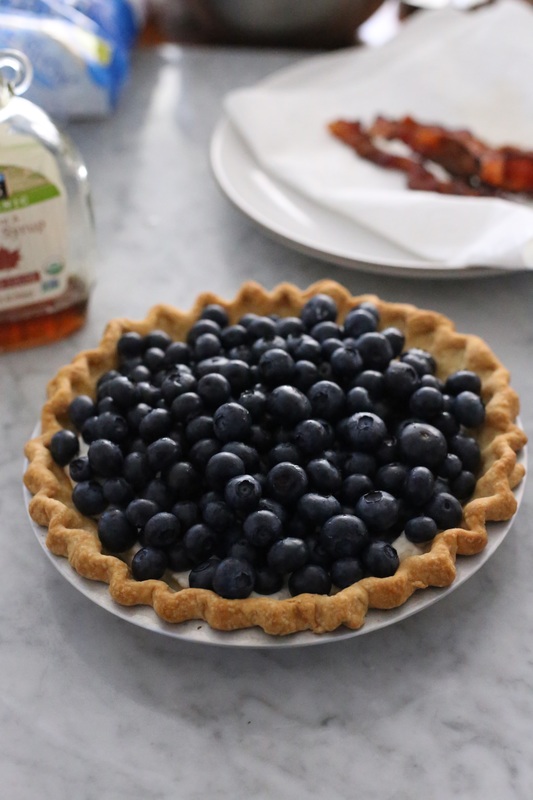
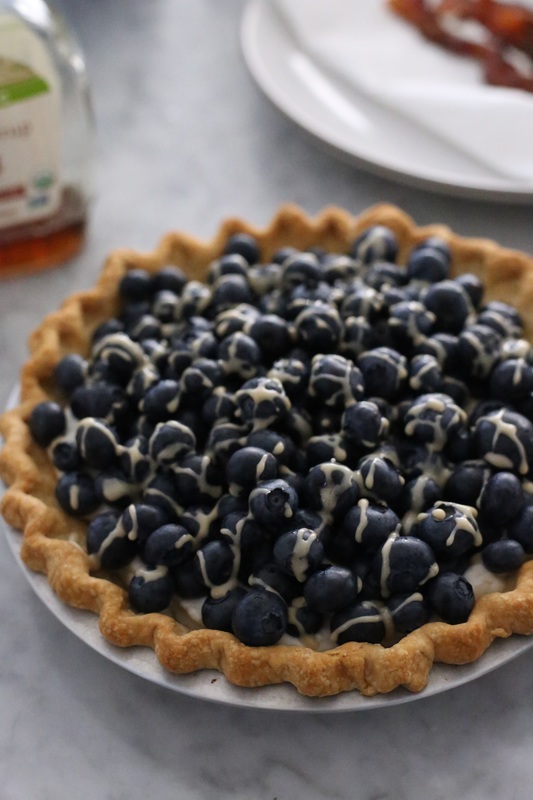
Be generous! Pie must be HIGH!
Picture
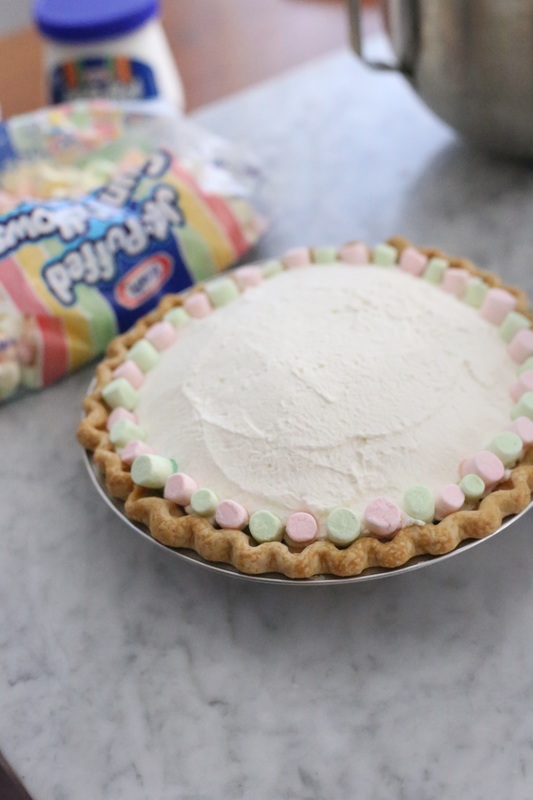
Decorate edges with FunMallows in circles along the crust.
Picture
Decorate with shredded coconut in the middle!
Picture
Serve, slice, and enjoy! And don't give this to your gynecologist. As he might fall in love with you upon first bite. After all, it only takes a taste.

Recipe for Marshmallow Mermaid Pie ("AKA Mermaid Marshmallow")


​Ingredients:
-1 truly flaky crust (single)
-2 egg whites at room temperature
-1 TSPN gelatin powder (1/2 packet Knox unflavored)
-1/4 cup water
-4-5 drops of green food coloring
-1/2 cup granulated sugar + 1 TBSPN
-1 1/2 cup heavy whipping cream
-1 TSPN coconut extract
-FUNmallows (small colored marshmallows-can color your own!)
-shredded coconut (sweetened or unsweetened)

Directions:
  1. Assemble your truly flaky crust into a pie shell, crimp edges
  2. Cover bottom and sides of crust with parchment or foil, add pie weights or dry kidney beans, and blind bake for 30-40 mins at 400F until edges are golden brown and crust is fully baked through. 
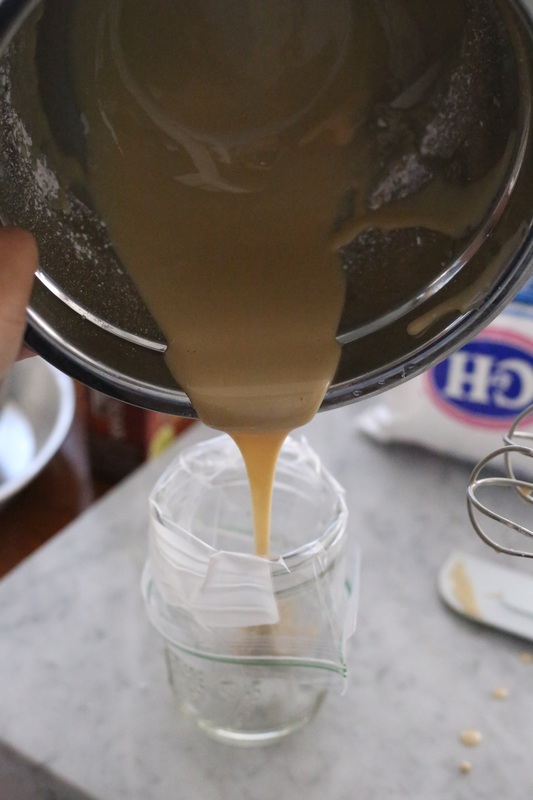
  3. Soak1 TSPN gelatin powder in 1/4 cup water for 10 mins, then dissolve until mixture is clear, over a double boiler. Let cool and set aside.
  4. To make marshmallow pudding: In a stand mixer (MUST  be a stand mixer-hand mixer does not whip fast enough), start to whip egg whites on a low speed, and slowly increase speed to high. When stiff peaks form, add granulated sugar, 1 TBSPN at a time until sugar is incorporated (at med-high speed). On high speed, slowly pour in warm gelatin liquid mixture. Then add green food coloring until you get your desired shade of mermaid green! Set aside.
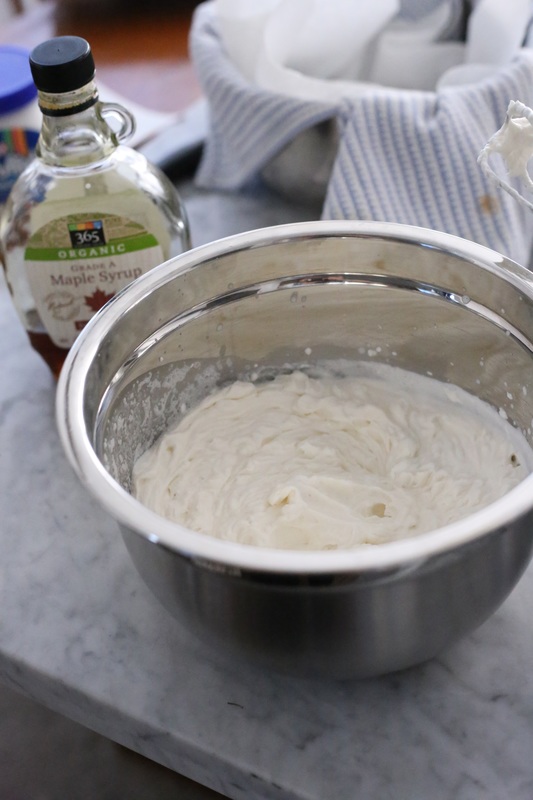
  5. To make coconut whipped cream: Whip 1 1/2 cup heavy whipping cream and 1 TSPN coconut extract until it forms into whipped cream. Set aside.
  6. Once crust is cool, spread marshmallow pudding into crust, then put pie in fridge for 20 mins to allow pudding to set in pie shell.
  7. Remove from fridge and spread whipped cream on top. Decorate with mini Funmallows (I picked out the green and red ones ;), and shredded coconut. Let sit in fridge for 1 more hour before slicing!
  8. SUGAR. BUTTER. FLOUR.
24 Comments

Deep (Shit) Dish Blueberry Bacon Pie

7/10/2016

13 Comments

 
Picture

Cal: Jenna, what's the special pie today?
Jenna: Deep Shit Blueberry Bacon!
Cal: Deep Shit?
Jenna: Deep Dish! Deep Dish! Sorry Cal!


This is a great pie idea in theory right? What can go wrong? Blueberries? Yum. Bacon? Extra yum. Hmmm.. turns out there is quite a lot that can go wrong. Not going to lie to the blogosphere, this was attempt #2 at Deep (Shit) Dish Blueberry Bacon Pie. First attempt, was truly a DEEP and SHITTY disaster! I'll describe attempt #1 for your amusement: "Blueberries baked in a truly flaky crust with bits of crisped bacon, topped with a bacon lattice".

Well. I should have known using a whole pack of bacon would be complete overkill. But I had to use that much for the taste of bacon to come through right? Wrong. DEEPly wrong. As the raw bacon lattice cooked atop the pie, all the grease from the bacon dripped right into the blueberry filling, causing there to be far too much bacon grease in a pie. There was so much bacon grease in the pie, as we took the pie out of the fridge the next day, we had to wonder... what are these white solid bits of things my pie??? Solidified bacon grease. That's what. While the lattice idea was cute, and looked very even before being placed in the oven, the bacon strips shrunk while baked. Leaving me with bacon lattice that didn't even touch the crust edge.

Okay. Lesson learned. Too much bacon overpowers the blueberries, raw bacon cooked in the pie leaves a cup and a half of bacon grease in the pie, and cooked blueberries might not be the best pairing with bacon. So back to the drawing board. After the suggestion of my official pie taste tester Jonathan, to use fresh blueberries instead of cooked, I decided to turn this Deep SHIT Blueberry Bacon into Deep DISH Blueberry Bacon. A cream pie so delicious it is worthy of being on Jenna's Pie o' the Day Board. One worthy of: "It sold so fast today I couldn't quite believe it!" -Jenna

So here is Attempt #2. And it is perfect. Truly. "Deep (Shit) Dish Blueberry Bacon Pie: Freshly whipped maple cream, with fresh blueberries in a truly flaky crust. Topped with maple icing, and sprinkled with bits of crispy fried bacon."

Picture
Picture
Crisp your bacon an a skillet.
Picture
Add maple syrup to freshly whipped cream to create a maple cream.
Picture
Fill truly flaky crust with maple cream.
Picture
Make maple icing with powdered sugar and maple syrup.
Picture
Pour icing into a plastic zip-loc bag.
Picture
Picture
Pour fresh blueberries over maple whipped cream.
Picture
Chop up crisped bacon into small bits.
Picture
Cut hole in bag with icing, and drizzle over blueberries.
Picture
Sprinkle bacon bits over the blueberries and icing.
Picture
Slice, serve, and enjoy! Let the combination of sweet maple cream, fresh tart blueberries, and salty crisp bacon take your taste buds out of this world! And be careful, because this one will go quick!

Recipe for Deep (Shit) Dish Blueberry Bacon Pie


​Ingredients:
-1 truly flaky crust (single)
-1 1/2 cup heavy whipping cream
-1/4 cup Grade A maple syrup
-4oz. of gelatin powder
-3 TBSPN of water
-2 pints fresh blueberries
-4 TBSPN maple syrup
-1/2 cup powdered sugar
-3 strips of fried, crisp bacon chopped into small pieces

Directions:
  1. Assemble your truly flaky crust into a pie shell, crimp edges
  2. Cover bottom and sides of crust with parchment or foil, add pie weights or dry kidney beans, and blind bake for 20-30 mins at 400F until edges are golden brown and crust is fully baked through. 
  3. Melt 4oz. gelatin powder into 3 TBSPN of water over a double boiler. Let gelatin mixture cool. 
  4. Whip 1 1/2 cup heavy whipping cream until it forms into cream. Whip cooled gelatin mixture into cream until fully incorporated, then whip 1/4 cup maple syrup into whipped cream.
  5. Let crust cool, and spread maple cream into truly flaky crust.
  6. Wash and dry (well!) 2 pints of blueberries, and assemble berries over the maple cream.
  7. Mix 4 TBSPN maple syrup and 1/2 cup powdered sugar with an electric mixer. When smooth, pour into a plastic bag draped over a cup or mug (to hold it's shape). Seal the bag, and cut a small end off the bag's corner. Drizzle generously over blueberries. *If you prefer your pie less sweet, use less icing
  8. Sprinkle chopped bacon over the icing before icing has hardened and set.
  9. SUGAR. BUTTER. FLOUR.

Picture
Picture
Picture

Some shots of attempt #1 for (more of) your amusement!

13 Comments

Polka Dot Peach Pie

7/8/2016

2 Comments

 
Picture

Isn't it amazing, what comes our way! 


"Polka-dot peach pie: Fresh, ripe peaches with a touch of almond extract and plenty o' sugar, baked in a truly flaky crust. Dotted with butter and polka-dot crust cut-outs on top." Peachy perfection!

Picture
Take your ripe yellow peaches...
Picture
...and peel and pit them, and slice them into thick wedges.
Picture
Mix with sugar, tapioca, and almond extract.
Picture
Prepare your truly flaky crust.
Picture
Picture
Use a biscuit cutter to cut polka-dots out of your second crust.
Picture
Picture
Dot with butter.
Picture

Lay polka-dots atop the peaches and butter...
Picture
...and bake to perfection!
Picture

Recipe for Polka Dot Peach Pie


Ingredients:
-1 truly flaky crust (double)
-1 1/2 LBS or 5 ripe, but firm yellow peaches
-1/2 cup o' sugar
-3 TBSPN tapioca starch
-1 TSPN almond extract
-1 TBSPN crust dust (1/2 part flour, 1/2 part sugar)
-1 TSPN minute tapioca
-1 TBSPN cubed butter
-egg white wash
-course white sugar
​+Extra equipment: small round biscuit cutter

Directions:
  1. Assemble your truly flaky crust into a pie shell, crimp edges, place in fridge.
  2. Use a vegetable peeler to peel and pit your peaches, slice into wedges (about 10 wedges per peach, or 1/2-3/4 in thick). *You can poach pears and peel skins that way if you prefer*
  3. In a large bowl, combine sliced peaches with: 1/2 cup o' sugar, 3 TBSPN tapioca starch, and 1 TSPN almond extract. 
  4. Roll out your second truly flaky crust, and cut small circular shapes using biscuit cutter. Polka-dots do not need to overlap, so you will only use about 1/2 the crust.
  5. Take truly flaky crust out of fridge, and sprinkle 1 TBSPN crust dust and 1 TSPN minute tapioca over prepared crust.
  6. Place peaches and their juices into truly flaky crust. Dot with 1 TBSPN cubed butter.
  7. Decorate top of peaches with polka dot crust cut-outs.
  8. Brush edges of pie and polka dot cut-outs with egg white wash, and sprinkle cut-outs with coarse white sugar.
  9. Bake at 425F for 20 minutes, then reduce to 375F. Cook until peaches and juice bubble and the polka dot cut outs are nicely browned (total time: 50-60mins). *If you notice your edges are browning too fast, take out mid-bake and cover edges with foil or silicone crust protector.
  10. Let cool and sit at room temperature for at least 4 hours before slicing!
  11. SUGAR. BUTTER. FLOUR!

2 Comments
<<Previous
Forward>>

    Author

    Waitress-wannabe. Baking hobbyist. Doggy mommy. Baking pies of all kinds inspired by the movie and musical WAITRESS.

    Archives

    August 2016
    July 2016
    June 2016

    Categories

    All
    Bacon
    Blueberry
    Breakfast Pies
    Cake Pies
    Cherry
    Coconut
    Cream Pies
    Crumble
    Fruit Pies
    Lemon
    Maple
    Marshmallow
    Mermaid
    Peach
    Pear
    Pies In Jars
    Pineapple
    Potato
    Quiche Pies
    Raspberry
    Rhubarb
    Strawberry
    Waitress Musical Pies

    RSS Feed

Proudly powered by Weebly
  • The Recipes
  • "Waitress" Pies
  • Contact